Hey there, fellow boaters! If you’re reading this, you probably have a boat or want to rent one, and you want to know how to tie it to a dock properly. Well, you’ve come to the right place.
In this blog, I’m going to teach you everything you need to know about tying a boat to a dock, from the basic tools and techniques to the common mistakes and tips for different weather conditions.
By the end of it, you’ll be able to tie your boat to a dock like a pro and enjoy your time on the water and on the land.
Why You Need to Learn How to Tie a Boat to a Dock
You may be wondering why you need to learn how to tie a boat to a dock. After all, it’s not rocket science, right? You just throw a rope around something and call it a day, right? Wrong.
Tying a boat to a dock is not only a matter of convenience and security but also a matter of safety and etiquette. A poorly tied boat can cause a lot of trouble, such as:
- Drifting away from the dock and getting lost, stolen, or damaged.
- Hitting the dock or other boats and causing damage or injuries.
- Getting in the way of other boaters and creating a nuisance or a hazard.
Trust me, you don’t want to deal with any of these scenarios. I’ve seen them happen, and they’re not pretty. That’s why you need to learn how to tie a boat to a dock properly and avoid these problems.
What You Need to Know Before You Tie a Boat to a Dock
Before you start tying your boat to a dock, you need to know some basic concepts and principles. Here are some of the things you should know:
Docking scenarios
Depending on the type and size of your boat, the type and layout of the dock, and the water and wind conditions, you may face different docking scenarios. For example, you may need to dock your boat parallel to the dock, perpendicular to the dock, or at an angle to the dock.
You may also need to dock your boat between two other boats or in a slip or a berth. Each scenario has its own challenges and requires different techniques and adjustments.
Tools required
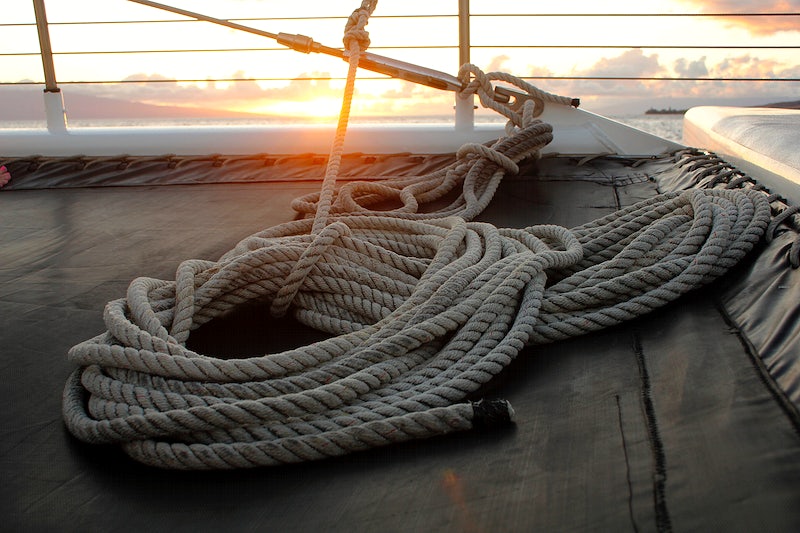
The most important tools you need for tying your boat to a dock are ropes and knots. Ropes are used to secure your boat to the dock, while knots are used to fasten the ropes to the boat and the dock. You should have ropes that are the right length, thickness, and material for your boat and the dock.
You should also know how to tie the most reliable knots for docking purposes and how to untie them when you need to leave.
Ropes and knots terminology
When you tie your boat to a dock, you will use different types of ropes and knots for different purposes. Here are some of the terms you should be familiar with:
- Dock lines: These ropes connect your boat to the dock. They are usually made of nylon, which is strong, flexible, durable, and resistant to water and sun damage. It also has some stretch, which allows it to absorb the shock of waves and currents. Nylon ropes come in different sizes, colors, and braids, such as three-strand, double-braid, and mega-braid. You should choose the size and braid that suit your boat and the dock best.
- Cleats: These are the metal or plastic fittings on your boat and the dock you use to secure the dock lines. They have two horns that you wrap the rope around in a specific pattern.
- Knots: These are the methods of tying the rope to the cleat, the boat, or itself. There are many types of knots, but some of the most reliable ones for docking are the cleat hitch, the round turn, two half-hitches, and the bowline knot.
How to Choose the Right Ropes and Knots for Docking
Now that you know the basics of ropes and knots let’s see how to choose the right ropes and knots for docking your boat.
Types of Ropes
The type of rope you use for docking your boat depends on several factors, such as the size and weight of your boat, the type and condition of the dock, and the weather and water conditions. Here are some of the common types of ropes used for docking:
- Nylon: This is the most popular and versatile type of rope for docking. It is strong, flexible, durable, and resistant to water and sun damage. It also has some stretch, which allows it to absorb the shock of waves and currents. Nylon ropes come in different sizes, colors, and braids, such as three-strand, double-braid, and mega-braid. You should choose the size and braid that suit your boat and the dock best.
- Polyester: This is another type of rope that is suitable for docking. It is similar to nylon, but it has less stretch and more abrasion resistance. It is also more expensive and less available than nylon. Polyester ropes are good for boats that need more stability and less movement, such as sailboats.
- Polypropylene: This is a type of rope that is cheap, lightweight, and floats on water. However, it is also weak, stiff, and prone to water and sun damage. It is not recommended for docking unless you use it as a backup or emergency rope.
Types of Knots
The type of knot you use for docking your boat depends on the purpose and location of the rope. Here are some of the most reliable knots you can use for docking:
Cleat Hitch:
This is the knot you use to tie the dock line to the cleat on the boat or the dock. It is easy to tie and untie, and it holds securely. To tie a cleat hitch, follow these steps:
- Wrap the rope around the base of the cleat from the opposite side of where the rope comes from.
- Make a loop around the first horn of the cleat and cross the rope over the center of the cleat.
- Make another loop around the second horn of the cleat and cross the rope over the center of the cleat again.
- Make a final loop around the first horn of the cleat, and tuck the end of the rope under the loop to lock it.
- Pull the rope tight to finish the knot.
Round Turn and Two Half-Hitches:
This is the knot you use to tie the dock line to a piling, a post, or a ring on the dock. It is also easy to tie and untie, and it holds firmly. To tie a round turn and two half-hitches, follow these steps:
- Wrap the rope around the piling, the post, or the ring twice from the opposite side of where the rope comes from. This is the round turn.
- Make a loop with the end of the rope over the standing part of the rope, and pass the end of the rope through the loop. This is the first half-hitch.
- Make another loop with the end of the rope over the standing part of the rope, and pass the end of the rope through the loop. This is the second half-hitch.
- Pull the rope tight to finish the knot.
Bowline Knot:
This is the knot you use to tie a loop at the end of the rope, which you can then attach to a cleat, a piling, a post, or a ring on the boat or the dock. It is a bit more difficult to tie and untie, but it is very strong and secure. To tie a bowline knot, follow these steps:
- Make a small loop with the end of the rope over the standing part of the rope, leaving some space at the end of the rope.
- Pass the end of the rope through the loop from behind the standing part of the rope.
- Wrap the end of the rope around the standing part of the rope, and pass it back through the loop from the same side as before.
- Pull the rope tight to finish the knot.
It is important to understand the different types of ropes and knots and how to use them properly. This will help you secure your boat to the dock effectively and safely.
How to Tie Your Boat to the Dock in 7 Easy Steps
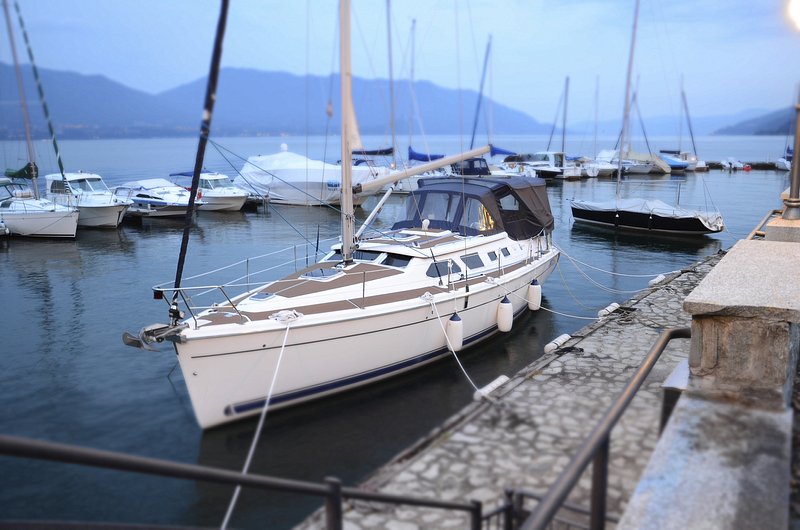
Now that you know the ropes and knots let’s see how to tie your boat to the dock in 7 easy steps. For this guide, we will assume that you are docking your boat parallel to the dock, on the starboard (right) side of your boat. You can adjust the steps accordingly for other docking scenarios.
Here are the steps to tie your boat to the dock:
Step 1:
Approach the dock slowly and carefully, keeping an eye on the wind and water conditions and the distance and angle between your boat and the dock. Use your engine, steering wheel, and rudder to maneuver your boat as close to the dock as possible without hitting it or scraping it.
This is the most tricky and nerve-wracking part of docking, so don’t panic and take your time. I know I’ve had my fair share of close calls and near misses, but I’ve also learned from them and improved my skills.
Step 2:
Have your crew or passengers ready with the dock lines and fenders. Fenders are the cushions that you place between your boat and the dock to prevent damage. You should have at least one fender at the front, one at the back, and one in the middle of your boat. You should also have at least one bow line, one stern line, and two spring lines ready to use.
Step 3:
As you approach the dock, have your crew or passengers place the fenders on the starboard side of your boat and hold them in place until the boat is secured. You should also have one of your crew or passengers ready with the bow line, which is the dock line that attaches the front of your boat to the dock.
As you get close to the dock, have your crew or passenger throw the bow line to someone on the dock or tie it to the nearest cleat on the dock. Make sure the line is not too tight or too loose and that it is not tangled or twisted. Use the cleat hitch knot to secure the bow line to the cleat on the dock. This will prevent your boat from moving forward or backward and help you control the angle of your boat.
This is the most important line to secure, so don’t skip this step. I once forgot to tie the bow line, and my boat drifted away from the dock, and I had to chase it down with a dinghy. It was not fun, let me tell you.
Step 4:
Once the bow line is secured, use the engine, steering wheel, and rudder to adjust the position and angle of your boat until it is parallel and close to the dock. You can also use the spring lines to help you with this.
The spring lines should run from the mid-point of your boat to the opposite ends of the dock, forming a V-shape. Use the round turn and two half-hitches knot to secure the spring lines to the pilings, posts, or rings on the dock.
These lines will prevent your boat from moving sideways and help you absorb the shock of waves and currents. They will also make it easier for you to leave the dock when you want to.
Step 5:
After the spring lines are secured, you can turn off the engine and check the tension and length of all the dock lines. You may need to adjust them to make sure your boat is stable and balanced and that it has enough room to move with the waves and currents.
You can also use the breast lines to keep your boat closer or farther from the dock, depending on your preference. Use the bowline knot to tie a loop at the end of the breast lines and attach them to the cleats, pilings, posts, or rings on the boat or the dock.
These lines will help you adjust the distance between your boat and the dock and also protect your boat from rubbing against the dock.
Step 6: Once all the dock lines are in place, you can exit your boat and enjoy your time on the dock. Make sure you have all your belongings and valuables with you and that you lock your boat if possible.
You can also check the weather forecast and the tide schedule and adjust your dock lines accordingly if needed. For example, if the tide is going up, you may need to loosen your dock lines a bit, and if the tide is going down, you may need to tighten them a bit.
This will prevent your boat from getting too high or too low and damaging your boat or the dock.
Step 7:
When you’re ready to leave the dock, you can untie your boat in the reverse order of how you tied it. First, untie the breast lines, then the spring lines, then the stern line, and finally the bow line.
Have your crew or passengers hold the lines and the fenders until you’re clear of the dock, and then pull them in and stow them away. Use your engine, steering wheel, and rudder to maneuver your boat away from the dock, and watch out for other boats and obstacles. And that’s it, you’re done!
Common Mistakes to Avoid When Docking Your Boat
Docking your boat can be a challenging and stressful task, especially for beginners or in difficult conditions. However, with practice and patience, you can master this skill and avoid some of the common mistakes that boaters make. Here are some of the mistakes you should avoid when docking your boat:
Approaching the dock too fast or too slow
If you approach the dock too fast, you risk hitting the dock or other boats or losing control of your boat. If you approach the dock too slowly, you risk being pushed away by the wind or the current or losing momentum and steering. You should approach the dock at a moderate and steady speed and use small and smooth adjustments to maneuver your boat.
This will give you more control and stability and prevent your boat from drifting away from the dock. I’ve seen some boaters approach the dock too fast and end up crashing into the dock or other boats, causing a lot of damage and anger. I’ve also seen some boaters approach the dock too slowly and end up missing the dock or getting stuck in the middle of the water, causing a lot of frustration and embarrassment.
Using too many or too few dock lines
If you use too many dock lines, you risk creating unnecessary tension and friction or making it difficult to untie your boat when you need to leave. If you use too few dock lines, you risk leaving your boat unsecured and unstable or exposing it to damage from the dock or other boats.
You should use the minimum number of dock lines that can secure your boat effectively and safely and use the appropriate types and lengths of dock lines for your boat and the dock. I’ve seen some boaters use too many dock lines and end up with a tangled mess of ropes that take forever to untie. I’ve also seen some boaters use too few dock lines and end up with a loose and wobbly boat that gets banged up by the dock or other boats.
Tying the wrong knots or tying them incorrectly
If you tie the wrong knots or tie them incorrectly, you risk having your dock lines come loose or slip or having difficulty untying them when you need to leave. You should learn how to tie the most reliable knots for docking purposes and practice them until you can tie them correctly and quickly.
You should also check your knots regularly and tighten them if needed. I’ve seen some boaters tie the wrong knots or tie them incorrectly, and end up with their dock lines falling off or getting stuck, causing their boat to drift away or get damaged.
Not using fenders or using them improperly
If you do not use fenders or use them improperly, you risk damaging your boat or the dock from the impact or the rubbing. You should use enough fenders to protect your boat from the dock and place them at the right locations and heights on your boat.
You should also adjust your fenders if the water level changes or if you move your boat. I’ve seen some boaters not using fenders or using them improperly and end up with their boat or the dock getting scratched, dented, or chipped, causing a lot of repair costs and headaches.
Conclusion
Tying your boat to a dock is an essential skill for any boater, and it can be learned and improved with practice and patience. By following this guide, you will be able to tie your boat to a dock like a pro and enjoy your time on the water and on the land.
I hope you found this blog post helpful and informative. If you have any comments, questions, or personal experiences to share, please feel free to leave them below. I would love to hear from you.

